Adding a Secondary (Redundant) Private License Server
Installing the Secondary Server
Main article: Using a Private Server License
The Private License Server supports setting up a redundant Secondary license server. This server does not respond to a license request from a Client unless the Primary server is no longer available on the network. The Private License Server software is installed on the Secondary license server in the same way as it was installed on the computer running the Primary license server, refer to the article Using a Private Server License for more details.
To configure the target computer as the Secondary server:
- Once the Private License Server has been installed, open the Licensing dialog.
- Enable the Secondary Server option in the Type region of the Licensing dialog.
- The Secondary Server Setup dialog should automatically open, if it does not click the Setup button to the right of the dialog, to open the dialog.
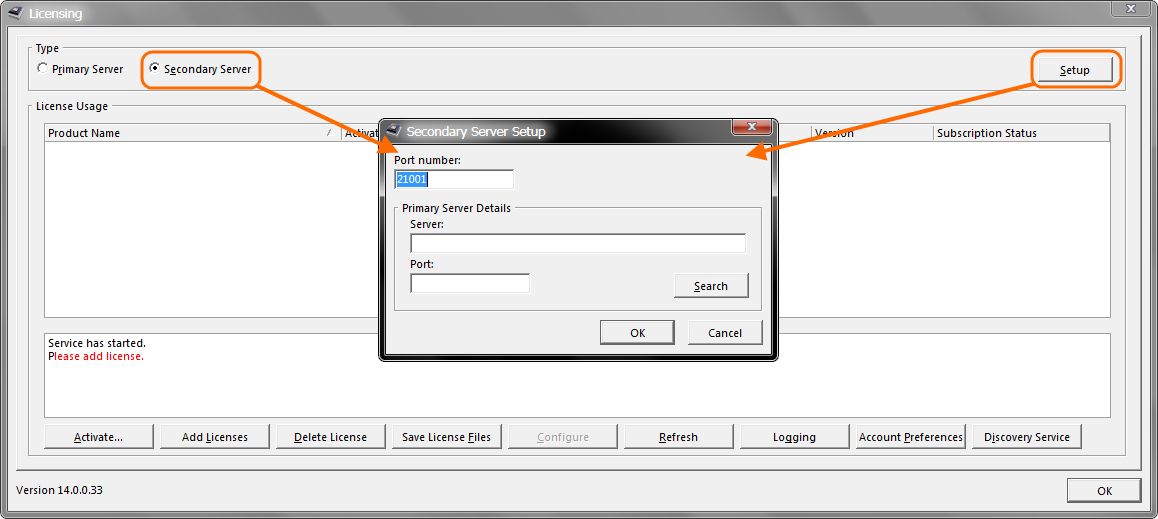
Setting up the Secondary server.
- The Primary and Secondary servers need to be aware of each other. To make the Secondary server aware of the Primary server, click the Search button in the Secondary Server Setup dialog to open the Primary Server Search dialog, then click the Search button.
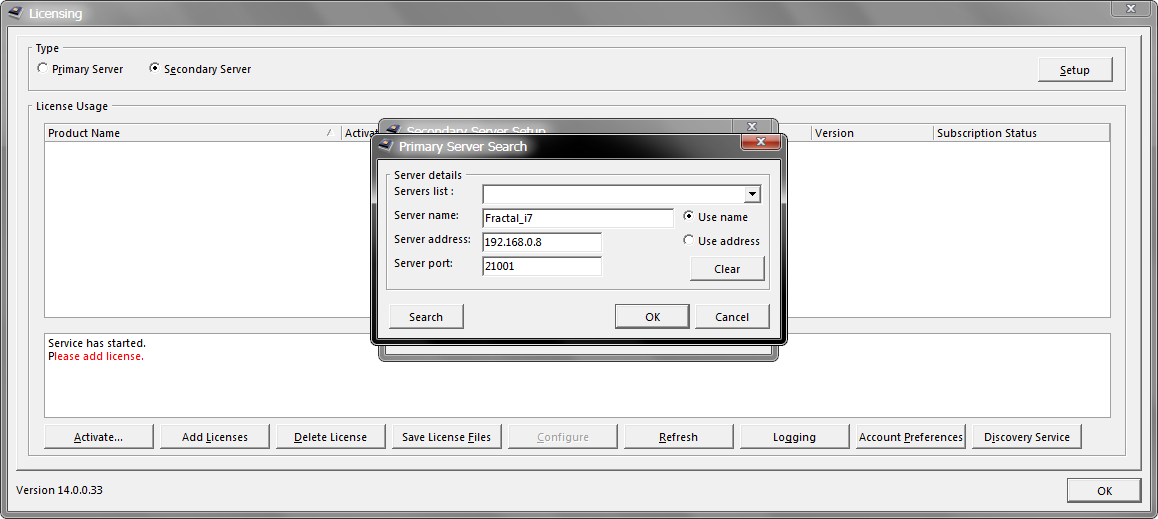
Either search for, or enter the details for the Primary server.
- A search is conducted for all Primary servers on the network. Choose the required Primary server in the drop-down Servers list and click OK to close the search dialog. The server name and port details will be added to the corresponding fields in the Primary Server Details region of the Secondary Server Setup dialog.
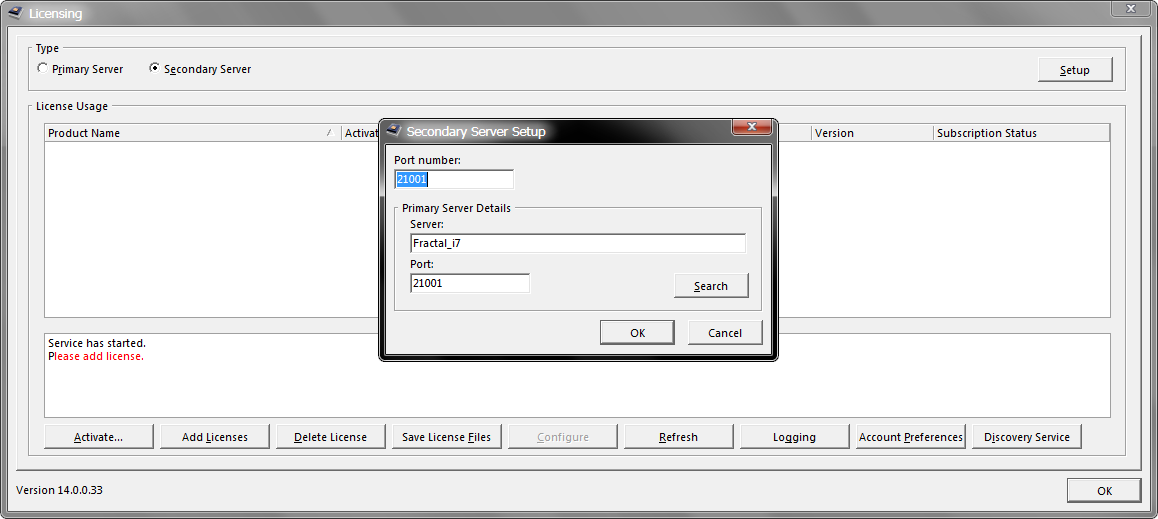
Locate the Primary server - the relevant details are then added to the Secondary server configuration.
The Secondary server is now configured in exactly the same way as the Primary server:
- Add Licenses , by either using the Activate button if you do not have
.alffiles, or the Add Licenses button if you have the.alffiles. Note that different license are used for a secondary server. - Configure the users, groups and license seat assignments. Note that these must be identical to the configuration in the Primary server.
Updating the Primary Server
Once the Secondary server is available on the network, return to the Primary server and configure it to recognize the Secondary server.
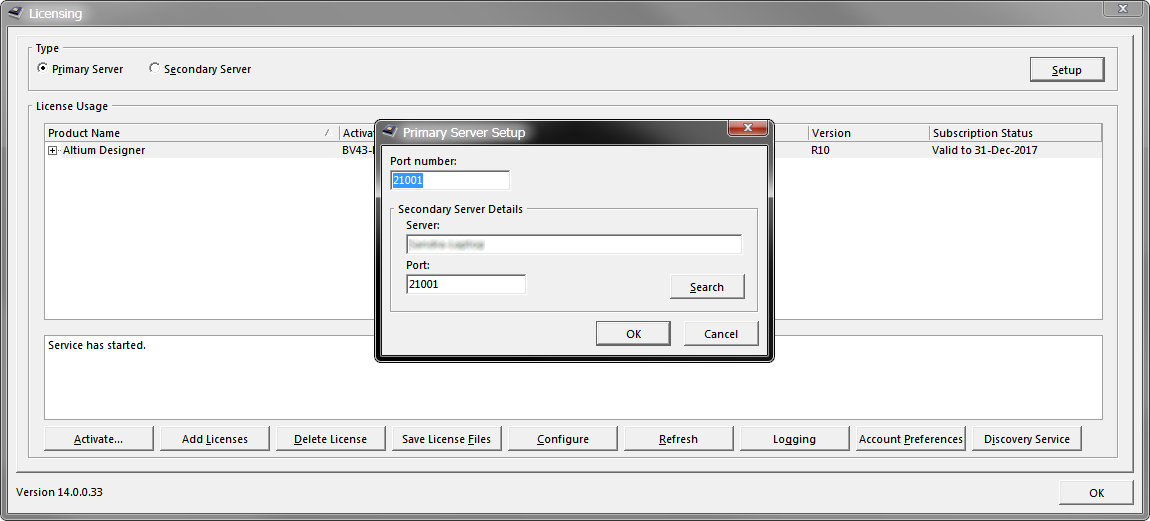
The Primary server is configured to be aware of the Secondary server.
To do this:
- Open the Licensing dialog on the Primary server.
- Click Setup to open the Primary Server Setup dialog.
- Click the Search button in the Secondary Server Details region. The Secondary Server Search dialog will appear, which you can use to locate the Secondary server and pass the relevant details into the Primary server's configuration.
Updating Altium Designer
The last step is to update the client Altium Designer installations to be aware of the Secondary server.
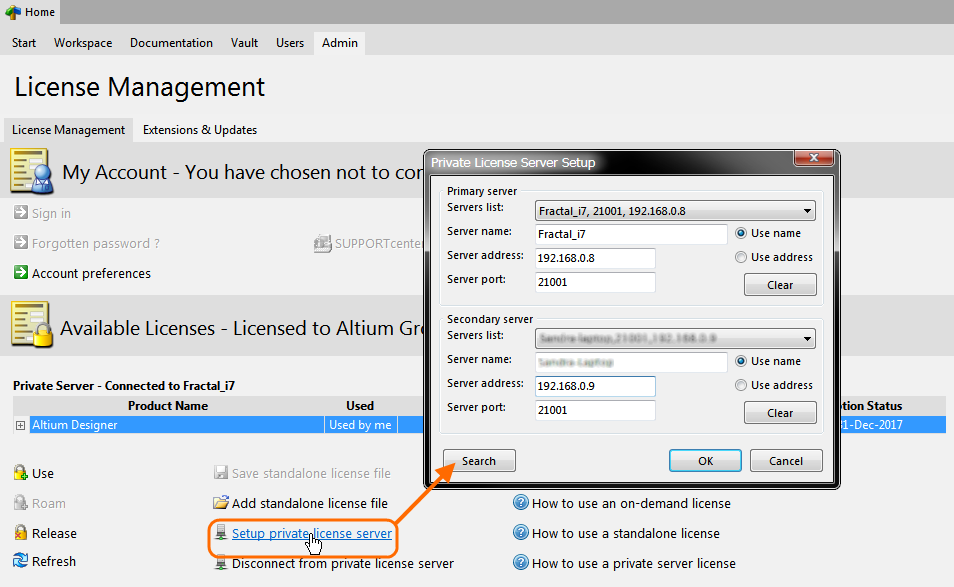
Adding the Secondary server in Altium Designer.
To do this:
- In the License Management window, click the Setup private license server link, to open the Private License Server Setup dialog, as shown above.
- Click Search to find, or manually enter the Server name, Server address and Server port details, then click OK to close the dialog.